Table of Contents
- When and why is ceiling waterproofing necessary?
- What is better to do waterproofing the ceiling from the inside or from the outside (exteriorly)?
- Types of materials for waterproofing the ceiling
- The arrangement of waterproofing of a concrete ceiling with your own hands and with the help of specialists: Step-by-step instructions
- How to make waterproofing of a wooden ceiling
- Prices for the ceiling waterproofing arrangement
- Features of waterproofing the ceiling in a private house
- Features of waterproofing the ceiling in the apartment
- The ceiling in the house under the roof
Both in apartments and in private houses, as well as in administrative buildings and commercial premises, it is extremely important to carry out high-quality waterproofing of all elements of the room. Without paying attention to the need for hydrophobic treatment of walls, floors, ceilings, and even entire rooms (for example, a bathroom), you can face a lot of problems, leaks, and high humidity.
To prevent this from happening, it is important not to neglect the stage of applying waterproofing materials used for such processing and the technologies of their application.
When and why is ceiling waterproofing necessary?
Hydrophobic treatment of the ceiling is not always carried out and not in all rooms. For example, in a large number of apartment buildings, high-quality waterproofing of floors is preferred, which, at the same time as protecting the floor, protects the ceiling of the lower floor from moisture and leaks.
Most often roll-type materials are used for such work, such as for example, roofing material and glass resin, as well as mastics of various compositions (bitumen, polymer substances). However, do not forget that waterproofing of indoor floors is not performed by everyone and not always, and it often happens that the nature of the arrangement of residential and industrial premises does not fully or partially comply with building regulations.
It is important to remember, that the waterproofing of the floor in the room, which will be your ceiling, does not always fit in accordance with all the obligatory rules, and can also quickly become unusable, as a rule, due to the use of cheap materials and poor-quality installation.
Accordingly, if you want to protect yourself from possible flooding and leaks, it would be best to organize additional work on applying waterproofing to the ceiling from your side of the room. High-quality waterproofing of the ceiling will help to avoid problems that may arise when flooding apartments or commercial premises located on the upper floors of the building.
There are also a number of conditions in which waterproofing the ceiling is a necessary measure. Among them are the following points:
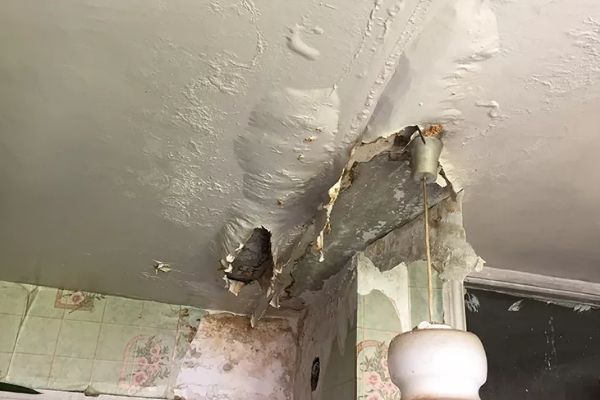
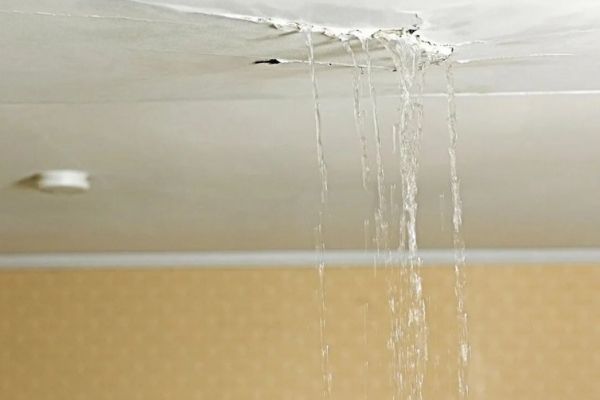
- The apartment is located on the top floor of an old apartment building: roofing damage often occurs in such houses. Such damage leads to atmospheric precipitation entering the attic space, and through it into apartments located on the upper floors of the house.
- You have no connection with the neighbors from above and you do not know how well they have waterproofed wet areas.
- In apartment buildings, waterproofing of the ceiling may be necessary not only for the apartments themselves but also for balconies and loggias. However, this is relevant only in cases, where the floor of the balcony located above is not equipped with waterproofing materials or is not glazed.
- Waterproofing of the ceiling is also necessary for rooms with high humidity (for example, it may be a consequence of poor-quality exhaust ventilation). In such rooms, condensation is formed and accumulated quickly enough, which can harm not only the ceiling but also other elements of the living space. It will not be possible to do without waterproofing the ceiling in the described conditions.
- Waterproofing treatment of ceilings is also traditionally carried out in certain types of rooms, such as a bathroom, toilet, or kitchen. However, do not forget that with serious flooding of the listed premises, water can penetrate into the internal cavities of the floor slabs and, consequently, into the rest of the apartment.
For this reason, attentive owners often carry out waterproofing treatment of all rooms of the apartment. Such a solution will help to ensure the safety of furniture and repairs, and will also prevent a short circuit that can occur in the wiring. - Above your commercial premises, there is a restaurant, a dining room, a kitchen, a gym with showers, a workshop where there is a lot of water, a swimming pool, or other similar structures.
- The basement of a private house, where the floor slab serving as the ceiling of the basement is below ground level or in level with it.
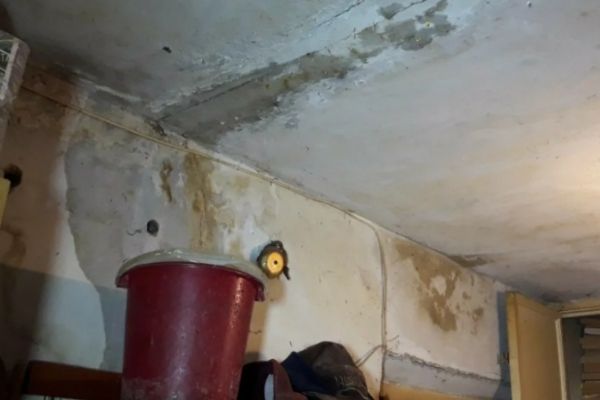
- Damp spots, mold, and mildew are constantly formed on the ceiling. As a rule, the reason for the formation of mold and mildew — is constant humidity, which can be fueled, including from the outside of the ceiling, for example, with constant leakage of pipes or lack of tightness of other nodes.

What is better to do waterproofing the ceiling from the inside or from the outside (exteriorly)?
Of course, it is most correct to perform waterproofing from the outside of the ceiling since:
- With external waterproofing, water and moisture will not have contact with the protected surface in principle and thus will not negatively affect and destroy it.
- Another great advantage of the waterproofing arrangement from the outer (positive) side of the ceiling is that the waterproofing made will work more efficiently and more durable, since it will work on the pressure (on the positive water pressure), and not on the separation, as with the waterproofing arrangement from the inside of the ceiling.
When installing waterproofing of the ceiling from the outside, you, in fact, perform waterproofing of the floor of the room from above. You can read more about the waterproofing of the floor in the article – “Waterproofing of a concrete floor in a private house – A detailed guide on how to do this work with your own hands and what materials to use at the same time“.
If it is impossible to perform high-quality waterproofing on the positive side of the ceiling, it is recommended to do it from the inside, although this is a less effective solution.
Types of materials for waterproofing the ceiling
Various types of materials are used for the hydrophobic treatment of ceilings, including penetrating and coating compositions, materials based on bitumen, cement, and polymer substances, plaster, as well as the installation of stretch ceilings. Let’s consider each of the listed types of hydrophobic compounds in a little more detail.
Penetrating waterproofing for the ceiling
Waterproofing materials of the penetrating type have an extremely useful property: they are able to penetrate into the thickness of the floors and fill small pores in the concrete base, thereby forming a reliable waterproofing coating over the entire thickness of the material.
Penetrating hydrophobic compounds can be distributed over the base in one or more layers. Most often, the materials are applied to the work surface in one thin layer, and the selected composition should first be prepared, bringing its consistency to a “creamy” state. The base is moistened before applying penetrating waterproofing and after the work is done.
Those crystal hydrates that ensure the resistance of the surface to moisture, when liquid hits the ceiling, begin to grow several times more actively, thereby increasing the water resistance of the base.
Advantages:
If we talk about the advantages of penetrating waterproofing for the ceiling, then we can highlight such points as:
- Compatibility of the described materials with any type of premises. This is due to the ability of hydrophobic compositions of the penetrating type not to affect the steam exchange in the room.
- Penetrating materials do not allow moisture to stagnate in the concrete base, binding the liquid falling on the ceiling into more complex chemical compounds.
- Waterproofing of the penetrating type allows further finishing of the ceiling without losing its useful properties.
- Over time, such hydrophobic treatment only improves its qualities.
Disadvantages:
The problem with penetrating compounds is that they do not work in places where there are large voids and pores in the concrete, as well as in places where microcracks have formed. As a rule, without the examination of concrete, large voids, capillaries, and microcracks are not visible, but in places where they are, the penetrating composition will not work.
You can read more about penetrating compounds in the article – “Penetrating waterproofing: A detailed description of its work on concrete, types of materials and application technologies“.
The scheme of penetrating waterproofing:

Polymer cement and cement waterproofing
Cement-based mixtures with the addition of polymeric substances, which are sold in dry form in construction stores, are considered an extremely popular material for waterproofing ceilings. The coating of polymer-cement materials is characterized by high reliability and water resistance.
Advantages:
- Among the useful properties of the waterproofing under consideration, it is also possible to distinguish its acceptable cost, low consumption, compatibility with any type of bases, as well as the formation of a comfortable microclimate in a residential area.
- Polymer cement waterproofing can be covered with most finishing materials, including, for example, paints, as well as a stretch or suspended ceilings. Also, decorative plaster is often used for ceiling decoration, which should necessarily be vapor permeable.
- The main advantages of high-quality cement and polymer-cement waterproofing — are that premium brands of this category are able to withstand negative water pressure (from outside to inside).
Important: When choosing a material for waterproofing the ceiling from the inside, it is recommended to choose not just cement-based materials, but those materials that can withstand negative water pressure.
The technology of applying polymer cement waterproofing includes the following steps:
- Choosing exactly the waterproofing compound that suits you in all respects, and purchasing it in the required quantity;
- Preparation of the working surface for waterproofing: its cleaning from dust and dirt and obligatory degreasing, as well as the elimination of external defects of the base;
- Mixing of polymer-cement composition and its distribution over the surface in strict accordance with the manufacturer’s recommendations.
Upon completion of all these steps, it is necessary to wait for the moment when the waterproofing applied to the ceiling completely hardens and is ready for finishing work.
You can read more about cement-based waterproofing in the article – “Cement-based waterproofing: Features, types, and methods of its application“.
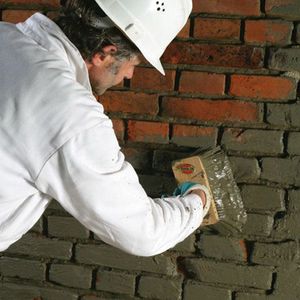
Plaster waterproofing
Another type of waterproofing — is plaster materials, which is also a dry mixture, based on cement with the addition of various polymers. Additional substances, which are supplied with cement, protect the ceiling from the effects of liquid.
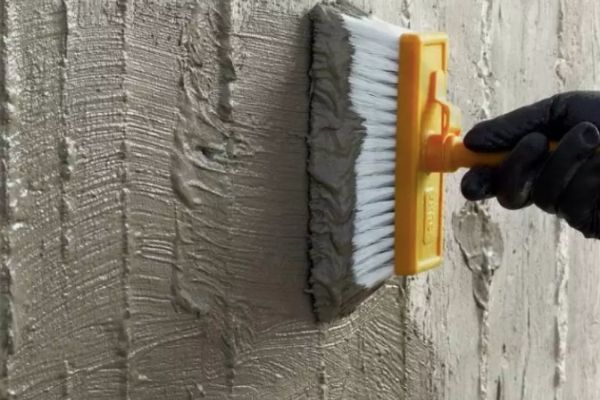
Plaster waterproofing is prepared using the same technology as the polymer-cement materials discussed earlier. To distribute the composition in question over the work surface, you can use a standard method, that is, of which a paintbrush or roller is needed. It is extremely important to properly knead the solution and carefully prepare the ceiling surface for its application (clean it and seal up all external defects). Do not forget that the waterproofing layer reaches the highest degree of water resistance only after complete drying.
Advantages:
Among the advantages of plaster waterproofing — are reasonable cost, the possibility of use in various rooms, providing a comfortable microclimate, as well as compatibility with almost all finishing materials.
Disadvantages:
- Most plaster compositions are unable to withstand negative water pressure and, accordingly, are not suitable for waterproofing the ceiling area from inside the room.
- The disadvantage is the property of the plaster to peel off from the ceiling when liquid gets under the waterproofing material, as well as the need to apply a leveling layer of putty before finishing.
However, due to its useful properties, plaster waterproofing is used for ceiling treatment in both dry and wet rooms. This is also due to the fact that such materials do not disrupt the steam exchange in the living space. Wallpaper can be glued on top of plaster materials, paint can be applied, and stretched or suspended ceilings can be installed.
You can read more about plaster waterproofing in the article – “Plaster waterproofing: Types of materials, their characteristics and methods of application“.
Bitumen waterproofing
Bitumen-based coating waterproofing is most often applied to the surfaces of walls or floors, however, in situations where there is a high risk of leaks, residential ceilings ate also treated with it, and the work is carried out in several layers (most often in 2-3 layers). The hydrophobic material is distributed over the ceiling surface with a roller or brush in a thin layer (2-3 mm), and each subsequent layer is applied only after the previous one has dried.
However, a significant disadvantage of bitumen waterproofing when used on ceilings is that, in fact, without an additional clamping device, it is unable to withstand the negative pressure of moisture and water. When the floor slab is saturated with moisture, the bitumen material will simply begin to peel off from the base and very quickly become unusable.
More information about cement-based waterproofing can be found in the article – “Bitumen waterproofing: types, characteristics, and technology of the arrangement“.
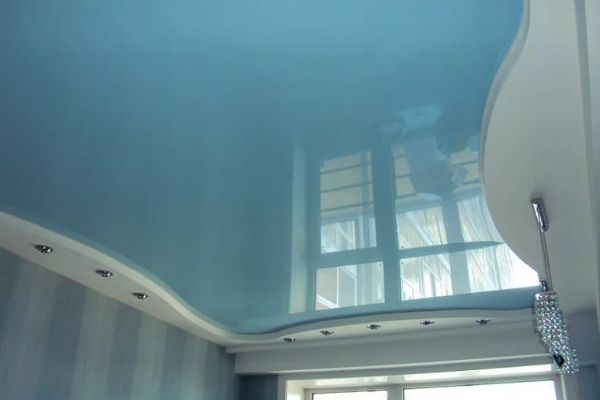
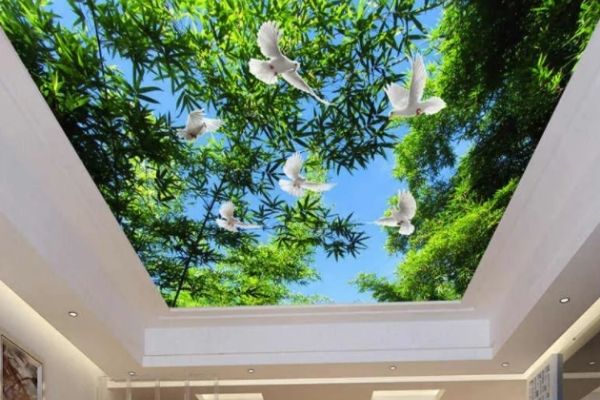
Stretch ceiling as waterproofing
Stretch ceilings are often used not only as decorative finishing of ceilings but also for their waterproofing. Ceilings made of PVC are able to withstand sufficiently large loads, for example, pressure of up to 100 liters of water per square meter of material. Due to its high elasticity, ceilings stretch during leaks and collect liquid, which is then pumped out, and the ceiling itself acquires its original shape.
Advantages:
The advantages of stretch ceilings – are reliable protection of the apartment from leaks, the possibility of use both in living rooms and in kitchens or bathrooms, as well as an excellent decorative effect, achieved among other things, due to the huge variety of colors of such ceilings.
Disadvantages:
- Stretch ceilings are not less than 5 sm, reduce the ceiling level, are not used at low temperatures, and are characterized by a fairly high cost.
- As for the installation of such ceilings, it is necessary to invite professional installers for it. It is they, who, with the use of special equipment and skills, will be able to thread the material through the profile and fix it on the ceiling with the help of beads. Even the most experienced amateur will not be able to cope with such a responsible task.
- In case of flooding or the formation of active leaks on the ceiling, water will freely pass through the cracks and junctions of the stretch ceiling and wall, destroying the finishing elements and getting inside the apartment or house.
- If moisture constantly gets on the ceiling from the outside, the concrete floor will absorb this moisture, as a result of which mold and fungus will be formed on the surface, which will be hidden behind the stretch ceiling, but at the same time will cause irreparable harm to the health of people living in such a room.
The arrangement of waterproofing of a concrete ceiling with your own hands and with the help of specialists: Step-by-step instructions
When installing waterproofing with your own hands, you need to pay attention to 3 things:
- The body of the concrete ceiling structure;
- Cold joints of the floor slab (ceiling) and walls, concreting joints, and other junctions and connections;
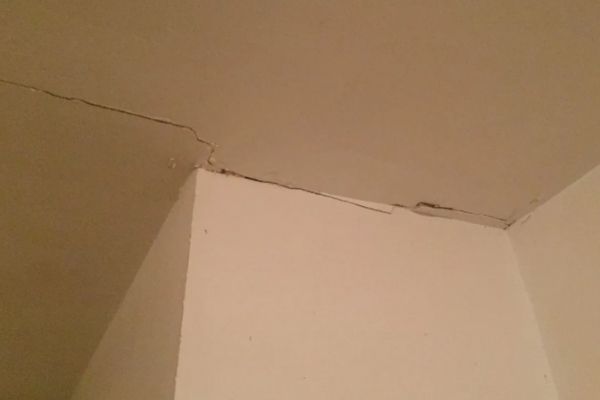
- Cracks in the ceiling;
- Places of communications entries, such as risers and other pipes.
Important: As a rule, leaks in the ceiling area begin with the weakest places-seams, cracks and places where communications are entered. Sealing of these nodes is quite difficult to do on your own and that is why it should be entrusted to professionals with the appropriate skills and equipment (as a rule, installations for injecting various compounds into the concrete body).
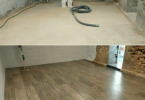
Waterproofing of the body of the concrete floor slab (ceiling):
In order to make the waterproof the ceiling with your own hands, it is necessary to follow all the recommendations of professionals on the implementation of this process. What steps does it include?
- Preparation. First, you need to prepare carefully the work surface. Finishing, plaster, and putty, if present, are removed from the ceiling. After that, only bare floor slabs should remain. Whitewash or paint can be removed from the surface by first soaking them in water. And plaster and putty can be easily removed from the base with any sharp object.
- Material. The choice of material is based on a variety of factors. Among them– are the type of room, the material of the ceiling, the operating conditions of the hydrophobic composition, and many other points. The types of compositions on which you can stop were described in detail earlier. In most cases, it is recommended to use materials that withstand negative water pressure (from the outside to the inside).
- Tool – It is important to understand that each material requires its own tools (brush, roller, sprayer, special equipment), and moreover, it is not always possible to cope with the work yourself.
- Application – Most formulations should be distributed over the surface using a paintbrush with synthetic hair or a roller. At the same time, it is important to carry out brush movements strictly in the same direction. The second layer of the material is applied only after setting the previous one. Brush movements for each next layer are carried out in a direction perpendicular to the previous one.
Important: if you have real leaks on the ceiling or serious reasons to believe that they may occur due to poorly executed waterproofing on the reverse side, then be sure to call specialists to assess the situation and make recommendations.
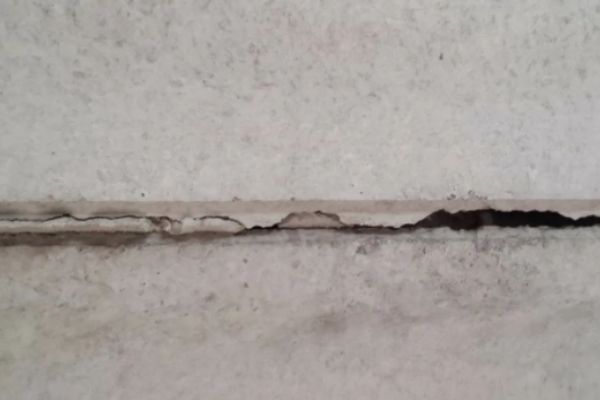
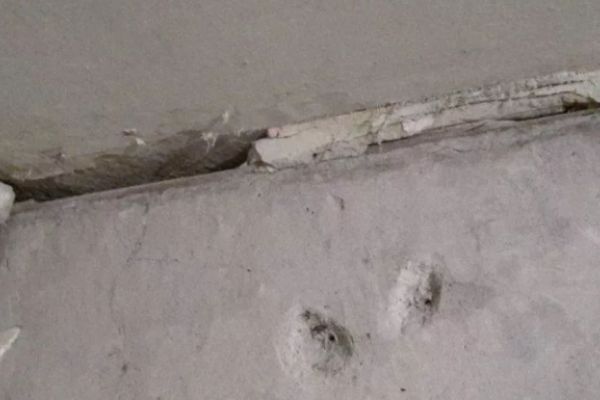
Cold joints between the ceiling plate and the wall, cracks, and concreting joints
Cold seams at the junctions or concreting seams (which are formed when one section is poured with concrete several times) are, as a rule, the weakest points in any structure, it is there that wet spots and leaks are formed in the first place.
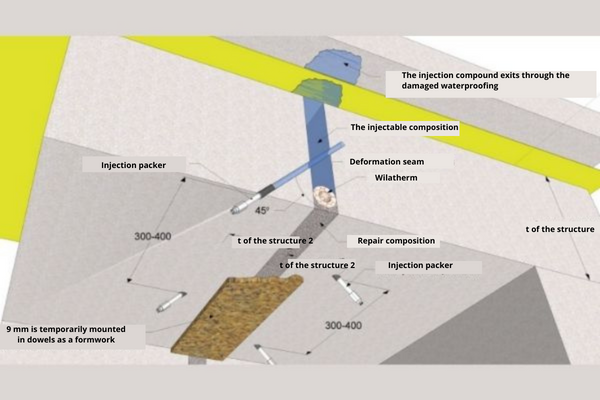
To seal such places, as a rule, suture materials and injection techniques are used, which allows filling all voids and microcracks in concrete from the inside:
- The seam or crack is unstitched to a certain depth;
- The base is thoroughly cleaned;
- Special expanding sealants are compacted into the completed indenting;
- After strengthening the seam or crack sealants, small holes are drilled along the perimeter in a staggered manner, and injectors are installed;
- Through the installed injectors, with the help of special equipment, a special injection composition is fed into the concrete body, which is selected depending on the specific situation.
You can read more about sealing joints and cracks in the following articles:
- Sealing and waterproofing of joints – concrete, cold, and deformation ones.
- Sealing and waterproofing of the inputs of communications into the building.
- Injection waterproofing


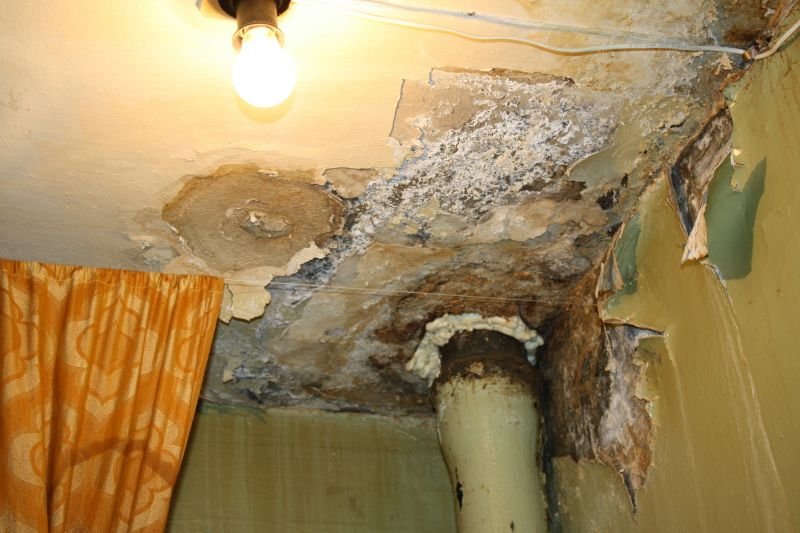
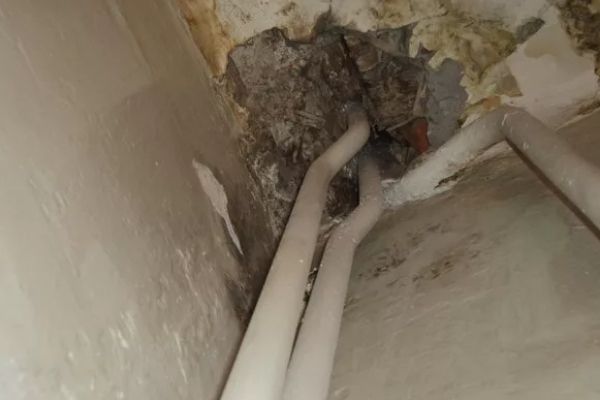
Communications entry points, such as risers and other pipes
The places where various communications are entered into a house, building, or apartment, through a ceiling or a floor slab, these are usually the most problematic points, and they are the ones that begin to flow first when the external waterproofing is broken.
As in the situation with seams, for reliable and durable sealing of these nodes, it is necessary to use newer and more reliable technologies than simply foaming the hole with sealants.
For more information about the waterproofing of the ceiling as a floor slab, see the article – “Sealing and waterproofing of the inputs of communications into the building“.
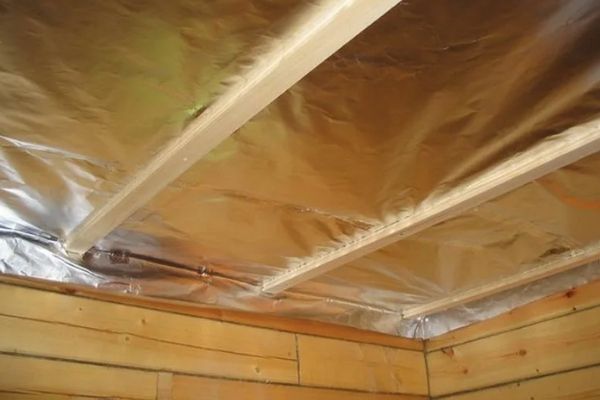
How to make waterproofing of a wooden ceiling
If the ceiling is made of wood and there is no access to it from the upper side, then the technology of its waterproofing from below will be somewhat different. The process includes the following steps:
- Sealing of all cracks with a special elastic polyurethane sealant;
- Fastening of wooden slats;
- Installation of a special waterproofing membrane for the construction of a wooden ceiling;
- The waterproofing membrane is necessarily fixed to the ceiling with an overlap of 15-20 sm.
In cases, where a particular room is characterized by high humidity, in addition to the membrane, a moisture-resistant film is also laid. The wooden base also allows the installation of a stretch ceiling, which will effectively perform both waterproofing and decorative functions. All the membranes described, with the exception of stretch ceilings, can be installed independently. To do this, you will need a stapler, large-width adhesive tape, a screwdriver, and screws.
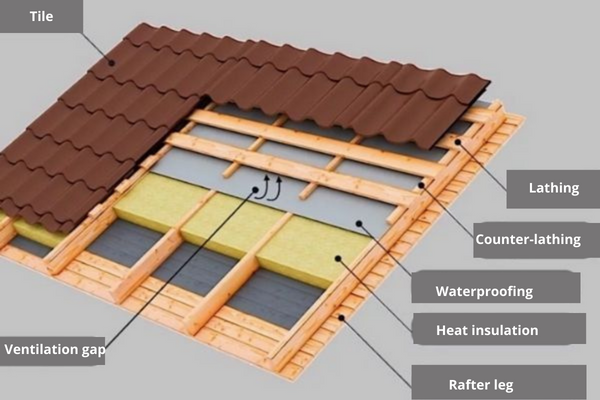
When accessing a wooden ceiling from the outside, its waterproofing will look like this:
- Installation of lathing;
- Installation of the waterproofing membrane overlap of 15-20sm;
- Installation of thermal insulation made of expanded polystyrene or mineral wool;
- Installation of vapor barrier film
- The arrangement of the finishing coating.
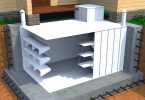
The layout of the layers of the wooden ceiling:
Prices for the ceiling waterproofing arrangement
| Description of works | Unit of measurement | Price in $ |
| From the outside | ||
| Installation of surfaced rolls in 1 layer | m2 | starting from 39 |
| Installation of pasting membranes in 1 layer | m2 | starting from 38 |
| Work on the installation of mastic insulation in 1 layer | m2 | starting from 20 |
| Works on the arrangement of liquid rubber | m2 | starting from 60 |
| Works on the application of cement-based compositions | m2 | starting from 60 |
| Works on the arrangement of polyurethane mastic | m2 | starting from 60 |
| Applying the primer | m2 | starting from 5 |
| From the inside | ||
| Works on the application of cement-based compounds | m2 | starting from 75 |
| Waterproofing of cold joints: -the arrangement of indenting -clearing the indenting -layer-by-layer sealing of non-shrinkable composition | running meter | starting from 60 |
| Injection waterproofing of seams/cut-off waterproofing -the arrangement of indenting -clearing the indenting -layer-by-layer sealing of non-shrinkable composition -the arrangement of boreholes and installation of packers -a complex of works on injection -dismantling of packers and sealing of injection holes | running meter | starting from 120 |
| Injection waterproofing into the concrete body -marking, the arrangement of boreholes, and installation of packers -a complex of works on injection -dismantling of packers and sealing of injection holes | m2 | starting from 190 |
| Waterproofing of communications entry points: -the arrangement of indenting -clearing the indenting -layer-by-layer sealing of non-shrinkable composition -the arrangement of boreholes and installation of packers -a complex of works on injection -dismantling of packers and sealing of injection holes | piece | starting from 1280 |
The prices indicated are based on a standard design. All the above prices are preliminary and can be changed if the object has certain difficulties in performing the work. To obtain an accurate price for works and materials, it is recommended to contact specialists.
Online calculator for self-calculation of the cost
Calculation of waterproofing cost
The total cost of waterproofing
Features of waterproofing the ceiling in a private house
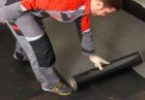
For waterproofing wooden ceilings between floors in a private house, films and membranes are most often used, which are stored and transported in the form of rolls. It is also common to use films with a membrane effect that can pass moisture only in one direction, thereby removing excess moisture from the room and at the same time preserving the properties of the insulation.
Most often, this type of material is used for waterproofing the ceilings of heated rooms. It is important to remember that a ventilation gap should be left between the hydrophobic material and the outer coating of the roof, which will ensure the exit of air masses.
Parchment and roofing material are not used too often in country houses today. This is due to the fact that these materials are characterized by fragility and far from the highest reliability indicators. Euro asphalt sheet, which includes innovative types of bases, on the contrary, is used quite often. Various sealants and tapes are great for sealing joints and pipes or for joining plates of hydrophobic material.
Waterproofing is fixed to the ceiling of a private house using galvanized nails or a stapler, and all joints and overlaps of materials should be glued with a special tape or smeared with bitumen mastics.
If the ceiling of a private house is made of concrete, then its waterproofing should be done according to the previously described technology.
Features of waterproofing the ceiling in the apartment
Waterproofing of the ceiling in the apartment is necessary only in some cases, which were described above. However, the desire to be safe and protect the living space from any surprises is not considered superfluous. Cement or penetrating waterproofing, safe for human health, is traditionally used for the hydrophobic treatment of ceilings.
Waterproofing treatment of rooms, such as kitchens and bathrooms, which are regularly exposed to high humidity, is most often carried out. If it was decided to process the ceilings of only these rooms, then it is necessary to thoroughly seal the joints, seams, and pipe entry points, since when the kitchen or bathroom is flooded, water through the joints and junctions can also get into the living rooms. It would be most correct to carry out such work with the help of professionals or at least under their supervision. Such an organization of the workflow will help to avoid unpleasant surprises.
The ceiling in the house under the roof
Sometimes your apartment, office, or other room is located on the top floor and the ceiling of such a room also serves as the roof of this building. In such a situation, the issue of waterproofing should be approached very seriously. As a rule, if the ceiling of your room serves as a roof, then its waterproofing should be approached as waterproofing the roof of a building or a private house.
You can read about the methods of waterproofing such a structure from the inside and outside in the following articles:
- Waterproofing of floor slabs: Methods and materials
- Waterproofing of the roof: methods of its arrangement and types of materials for performing high-quality work
- Waterproofing of a flat roof. Recommended materials, methods of their installation, and prices for work
- Roof waterproofing repair: Methods, materials, and prices
- Waterproofing of metal tile roofing: Materials and technology of their installation under metal roofing of cold and warm roofs
- Waterproofing of the terrace: Methods, materials, and recommendations for repairs and arrangement with your own hands